Digital painting in Photoshop is a versatile and powerful way to create artwork. It offers a wide range of tools and techniques that mimic traditional painting while providing unique advantages. This guide will take you through the process from the initial sketch to the finished piece.
Preparing Your Workspace
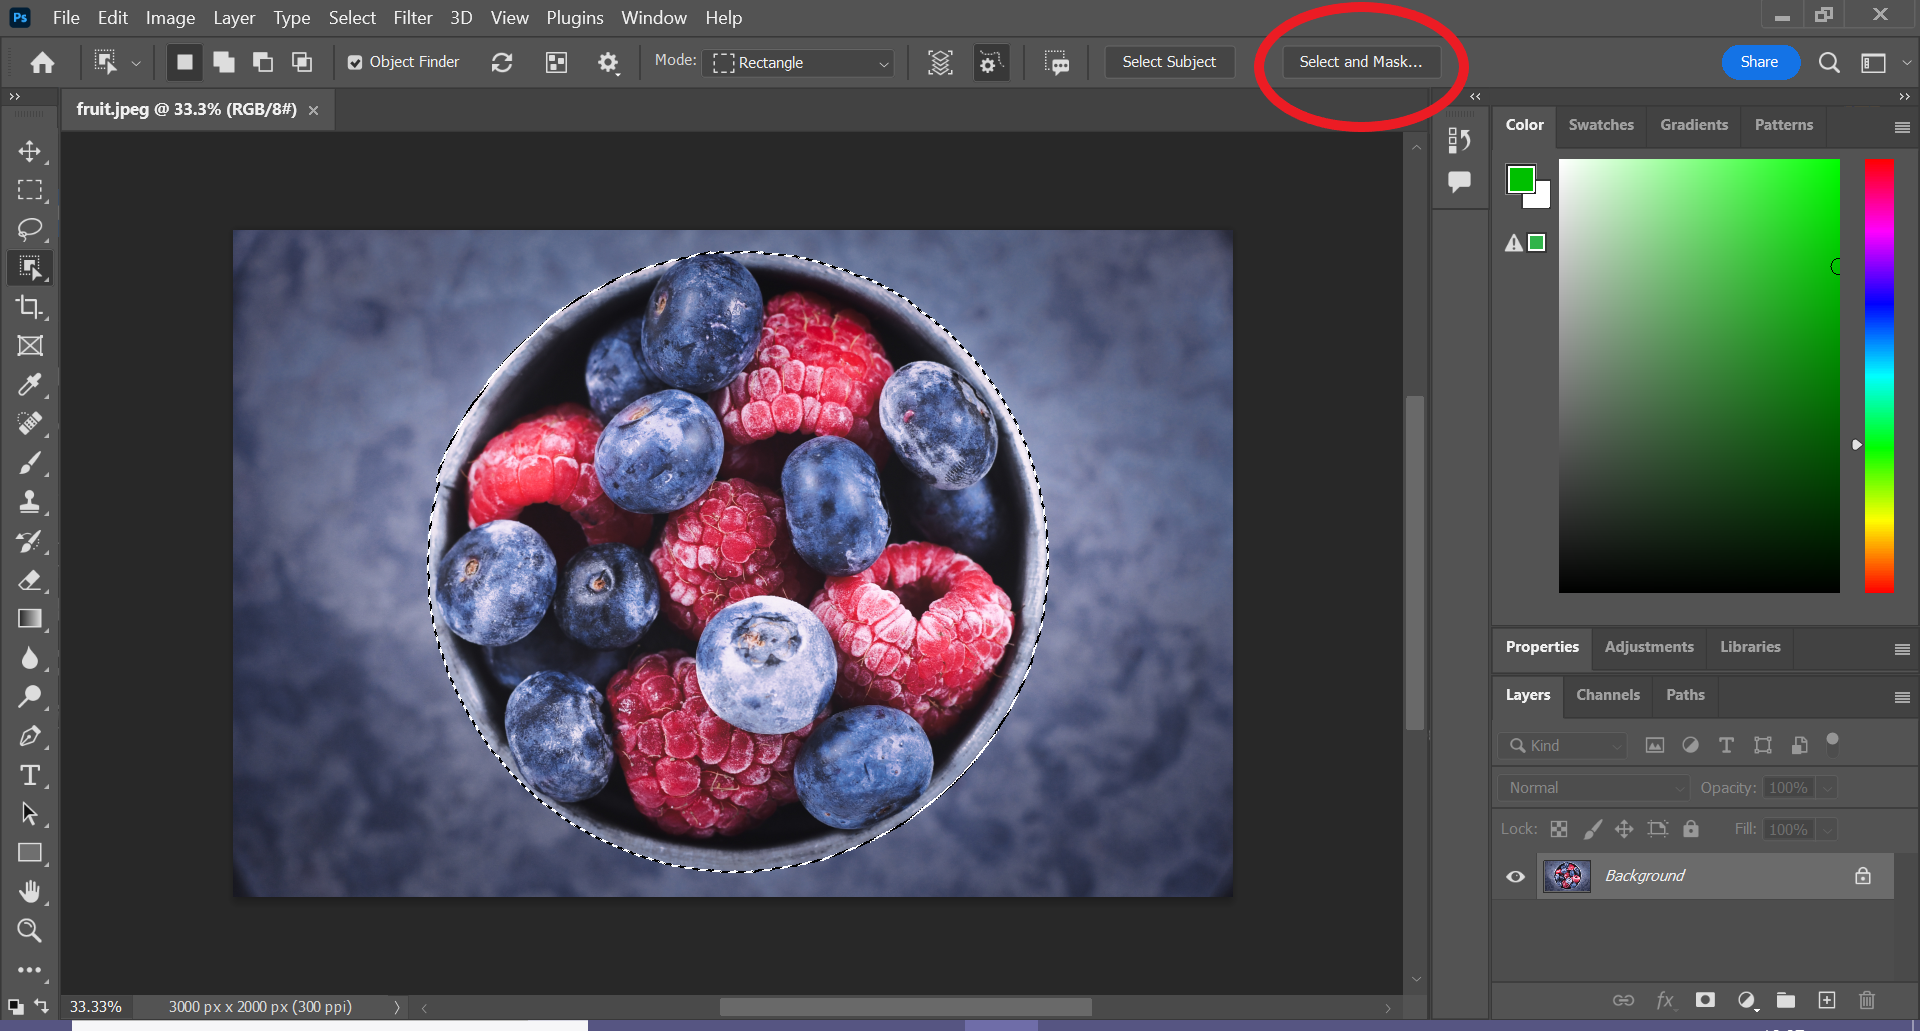
1. Setting Up Your Canvas • Open Photoshop and create a new document. Choose a canvas size appropriate for your project. For print-quality images, typically start with a resolution of 300 dpi. • Set up your layers panel and create separate layers for different elements of your painting. Labeling layers help keep your workflow organized. 2. Brush Settings • Photoshop comes with a variety of default brushes, and you can download additional brushes tailored for digital painting. • Customize brush settings such as size, opacity, flow, and pressure sensitivity (if using a tablet) to achieve different effects. Experiment with brush dynamics to mimic traditional media.
Creating the Initial Sketch
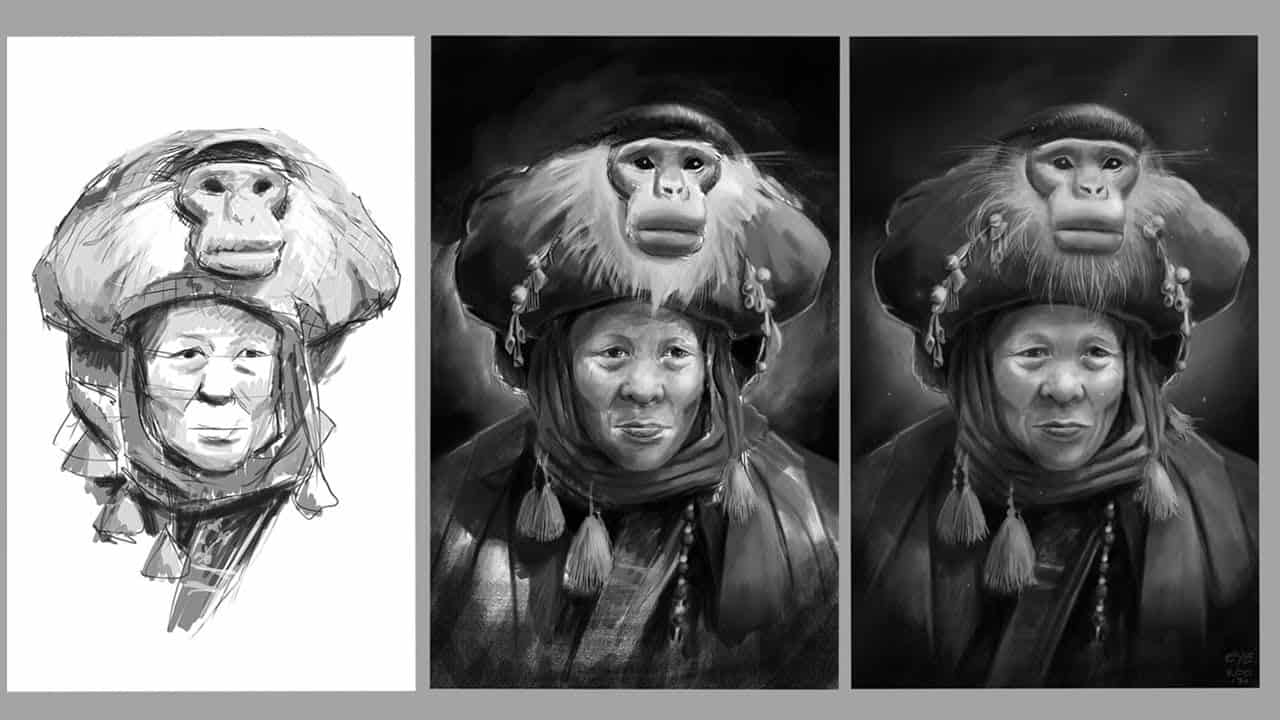
1. Rough Sketch • Begin with a rough sketch on a new layer. Use an essential round brush or a pencil-like brush with light opacity to draw your basic shapes and composition. • Focus on the overall layout and proportion without worrying about details at this stage. 2. Refining the Sketch • Lower the opacity of the rough sketch layer and create a new layer on top for the refined sketch. • Use a smaller brush size to add details and clean lines. This refined sketch will serve as the blueprint for your painting.
Blocking in Colors
1. Base Colors • Create a new layer beneath your sketch layers for base colors. Use a larger brush to fill in the main areas with flat colors. • Choose a color palette that suits the mood and style of your artwork. For inspiration, you can use color swatches or reference images. 2. Adding Values • On a new layer, start adding values (shadows and highlights) to give your painting depth. Use a soft round brush with varying opacity to build up the light and shadow gradually. • Focus on the light source and how it affects different surfaces in your painting.
Building Up Details
1. Layer Management • Group related layers together, such as all the layers for a character or background elements. This makes it easier to manage and edit specific parts of your painting. • Clipping masks are used to apply shading and details to specific areas without affecting other parts of the layer.
Final Adjustments and Finishing Touches
1. Color Adjustment • Use adjustment layers (like Curves, Levels, and Color Balance) to fine-tune your painting's colors and contrast. Adjustment layers are nondestructive and can be modified at any time. • Experiment with blending modes to add exciting effects and enhance the overall look of your painting. 2. Final Touches • Add final highlights and refine any details that need extra attention. Zoom in to work on small areas and ensure everything looks polished. • Use the Smudge Tool or Blur Tool sparingly to soften edges and blend areas smoothly.
Conclusion
Digital painting in Photoshop is a rewarding process that combines artistic skills with digital techniques. By following these steps, from setting up your workspace and creating an initial sketch to adding final details and adjustments, you can create stunning digital artwork.
Sierra
Post navigation
 Watch the original video tutorialOpens on YouTube